Telescope
Explore Scientific ED80

This telescope is an air-spaced triplet apochromatic refractor. It has high-quality optics that produce sharp images, and the air-spaced triplet design using ED (extra-low dispersion) glass helps eliminate false color and chromatic aberration. It is very light and portable, which makes it easy to set up and transport to a dark sky site. The 80mm aperture is relatively small, but this telescope is great for wide-field astrophotography.
Specs
Focal Length: 480mm
Aperture: 80mm
Focal Ratio: f/6
Weight: 7.5lb
Resolution: 1.45 arc seconds
Mount
Celestron Advanced VX German Equatorial Mount

This is an affordable german equatorial mount. The main advantage of this mount is its ability to track the movement of the stars across the sky when it is aligned with the celestial pole (called a polar alignment), allowing me to take the long exposures necessary to capture dim galaxies and nebulae. Weighing 18lb, it is portable enough to be taken to a dark sky site. It has a maximum instrument capacity of 30lb, which is more than adequate for the weight of my current setup. One of the greatest features of the mount is the Celestron Nexstar+ hand control with computerized GOTO capability. Once aligned, this allows me to pick from thousands of objects in the database of the hand controller that the mount will automatically slew to. The hand control also has an All Star Polar Alignment feature to assist with polar alignment. Another advanced feature is the permanently programmable Periodic Error Correction, which allows me to eliminate recurring tracking errors from the worm gear of the mount.
Camera
Canon EOS Rebel T2i 550D

There are several types of cameras available for astrophotography, but I use an unmodified Canon DSLR. It is an inexpensive yet reliable DLSR camera for astrophotography. It has an APS-C sized sensor, live view capability, and an ISO range of 100 to 6400. The battery will last for about 3.5 hours of continuous use, so I bring extra batteries if I’m going to be imaging for an entire night.
Astro-modifying a camera
Most DSLR cameras contain a long-wavelength filter that passes very little red hydrogen-alpha light. Camera manufacturers include this filter to make the camera’s response to color more closely match that of the human eye. The reason this is important is because many emission nebulae, such as the Orion Nebula (M42) or the Lagoon Nebula (M8), are dominated by this red hydrogen-alpha light. A stock DSLR camera will block most of the red hydrogen-alpha light from passing through. A solution to this is to “astro-modify” your DSLR camera by removing or replacing the stock long-wavelength filter to allow the camera to pass more hydrogen-alpha light. Currently, my camera is not astro-modified.
Other Equipment
Explore Scientific 2″ Field Flattener
By design, most telescopes, including the Explore Scientific ED80, have a curved focal plane. This is no problem for visual observing, but for digital astrophotography, a curved focal plane causes edge-of-field aberrations. A field flattener takes the curved focal plane and makes it flat, eliminating this problem. The field flattener is attached to the camera in the picture above.
Astronomik CLS Clip-in Filter

One of the biggest challenges in astrophotography is light pollution caused by city lights. Ideally, astrophotography should be done from a dark-sky site, but it is not always possible or practical to take all of your equipment and drive hours outside of a city to escape light pollution. The Astronomik CLS filter is a light pollution filter that blocks the light of mercury and sodium-vapor lamps, which are a large source of light pollution, while allowing the emissions of astronomical subjects to pass. The filter clips into the camera body.
Using this filter, I am able to take longer exposures under light-polluted skies, thus improving the signal-to-noise ratio of my images. It is important to note that when using this filter with a stock camera, the color balance will be slightly shifted.
Celestron 17 Amp-hour Power Tank

The power tank allows me to power the mount, laptop, and anything else I may need to power in the field. I use a power inverter to charge the laptop on DC power. I can also charge up camera batteries and my phone this way. The power tank also has a bright spotlight and a more dim red light, which is helpful when setting up or taking down equipment in the dark.
Software
BackyardEOS

BackyardEOS is the software that allows me to control my camera when imaging. One of the most useful tools it has is the ability to focus the camera precisely. It also allows me to set a number of exposures, length, and other settings and monitor images on the computer screen as they are captured.
DeepSkyStacker
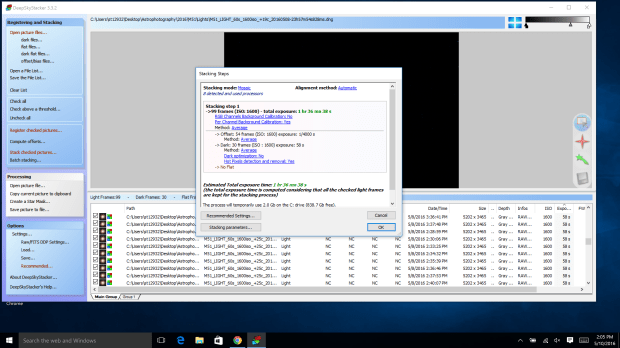
DeepSkyStacker is the software I use for calibration and stacking of my images. This is one of the most important steps, as it allows me to stack multiple individual exposures together to simulate one long exposure. For example, my image of M16 was created my stacking 88 one-minute exposures to simulate one 88-minute exposure. DeepSkyStacker also allows me to use calibration frames such as dark frames, flat frames, dark flat frames, and bias frames to further enhance the quality of my images.
Adobe Photoshop

I do my final steps of processing in Adobe Photoshop. Because I shoot in RAW format, even a calibrated and stacked image appears dark with very little to see. Only after processing in Photoshop does an image appear anything like a final product.
Example of a Setup in the Field

This was my setup at Blue Ridge Observatory on Flattop Mountain on May 8, 2016.
